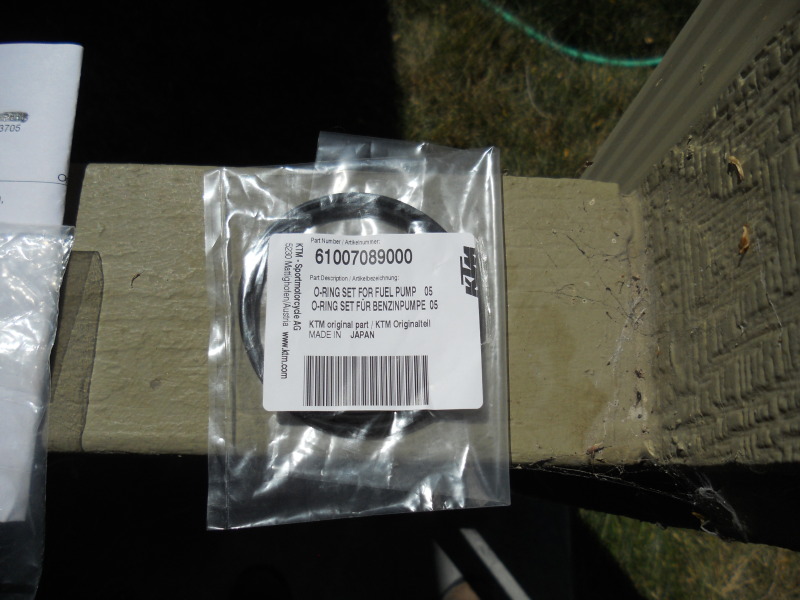
I won’t go into how you have to take of the tanks etc. I am assuming your smarter than a 6th grader (well except maybe for a couple of you) and am not going to bother with those details. This starts from the point where the pump is already removed from the tank and you have the necessary filters and O rings to make the swap.
One tip, it is really a pain in the ass to re-use the smaller of the two O rings that seals the pump to the tank. I tried but had no luck so I just replaced it with the new one.
This is what the pump assembly looks like split into its two main components. The top part in white houses the cartridge filter. You have to remove the cage, ground screw and electrical leads to remove the second part of the pump and filter from the housing. The first part is just held in place with two clips.

Those are the two ears you see above where my thumb is pointing to the ground screw I referred too.

This was the first tricky part I could not figure out, how to separate the top section to get at the cartridge filter. There are two ears internal to the piece that have to be pushed in and the inner section pulled out with a pair of pliers.

I used two 1.27mm allen wrenches to slide down the guide-way to depress the two ears, you can use a small screwdriver but you would need two sets of hands. This was fast and easy.
You can kinda see the guidways at the 3 and 6 O'clock position in this pic


Here is that part with the new cartridge filter on it. Make sure to transfer over the O ring inside the cartridge filter to the new one.

Now it was time to go after the bag filter, you have to remove the pump from the housing to do this.
Start by removing the electrical connections.
Two terminals and the ground.
The terminals are marked so don’t worry about it.
Next come the cage screws.
There is one on either side of the pump.

Kinda hard to see but they are peeking out from either side.

Once the pump is slid out of the housing you have access to the filter bag

It just pops off no screws etc.

There is one fiddly bit under the pump is a rubber thingy you have to make sure you put it back with the pump properly oriented when inserting back into the housing. Forgot to get a picture of it but if you get this far you will know exactly what I am talking about.
Now just reverse the order and put it back together making sure to lube all the o rings for safety.
Old vs. New


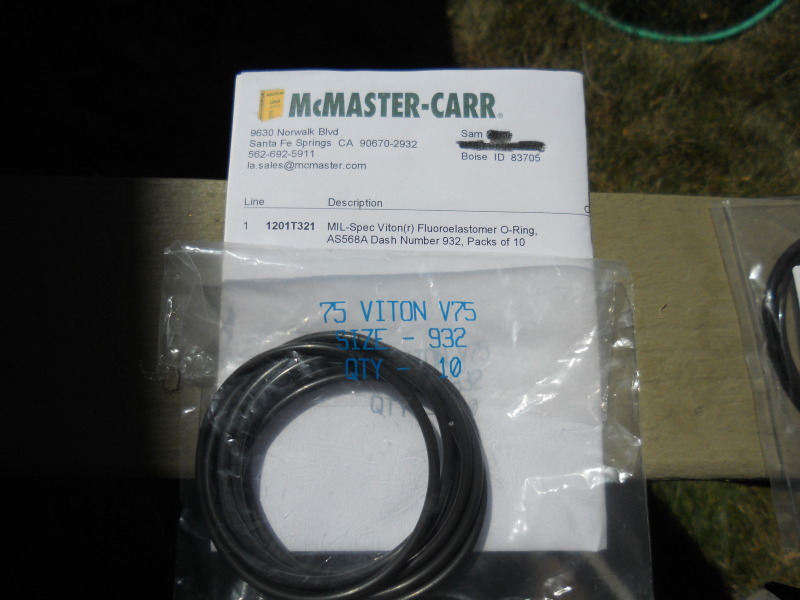 I purchased this as a pack of 10 for 14.95, 19.98 shipped much better than the OEM price and I now have a lifetime supply