Sym-Tec Heated Grips
By:NothingClever
thought I'd post my installation steps and photos. This is another mod that's easy but high-payoff if you ride year 'round.
1) Remove the headlight:
Some will argue this is not necessary. However, I like to have room to see what I'm doing and I don't have much patience for trying to tug on wires to splice in or try to do something by feel while I stick my tongue halfway out my mouth and make strange faces  .
.
Also, and more importantly, I wanted to rig my grips to be "switched hot" which means that I want to run power to the on/off toggle from something that is already in the loom. I chose the parking light out of habit & safety but also because I wanted to save the ACC1 (always hot) & ACC2 (switched hot) for other stuff in the future.
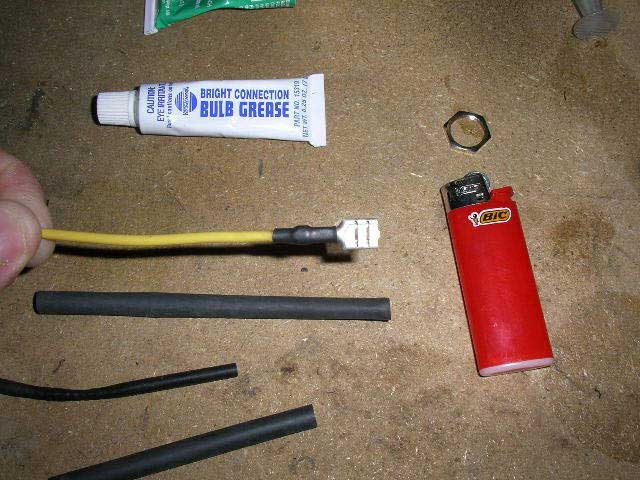
2) Cut off the old grips, prep the new grips & install the clutch-side heat sink barrier:
I picked up some Pro-Grip rally grips which I used on my Dakar. They're extremely durable and comfortable so I thought I'd give them a shot on the Katoom.
I use a socket on a 6" extension & a rubber mallet to cut the end holes in my grips. Motion Pro sells a tool for U$D20 or so ....knock yourselves out (no pun intended). I'm a cheap bastard.
I used a heat-shrink tube from a ground cable splicing kit. Measure twice and cut once as they say. You'll need to use some kind of lubricant like contact cement or hair spray and work quickly as this one is a tight fit. Coat the inside of the tube and the handlebar, too (the outside of the handlebar, you ninny....). Take your hand guard insert out to prevent the heat shrink tube from hanging up.


3) Apply the heated elements, route the wires & fit the connections:
I didn't follow the manufacturer's instructions which tell you to position the wire at the 3 o'clock and 9 o'clock positions (throttle side and clutch side respectively as you're looking at the end of the bar). I've found that rotating the elements back just a bit helps keep my hands warmer, kinda like the time I was able to cross Colorado, Nebraska, Iowa and Illinois on a January day when it was about 14F....YMMV.
Use something to make sure the 3M VHB glue sets up evenly and doesn't pull away. Some people use tape but I didn't want to have to clean up a bunch of goo later.
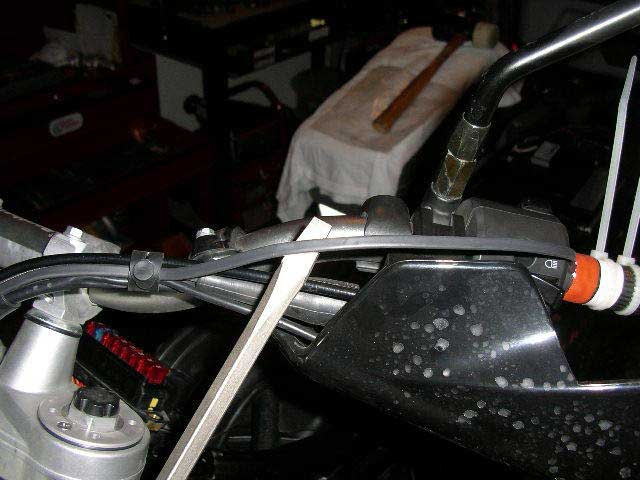
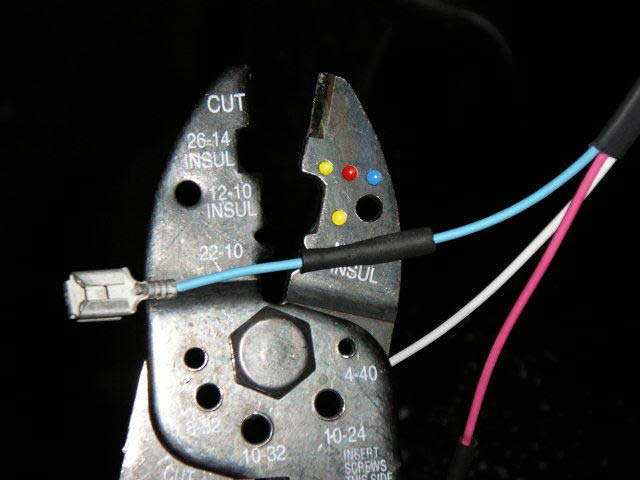
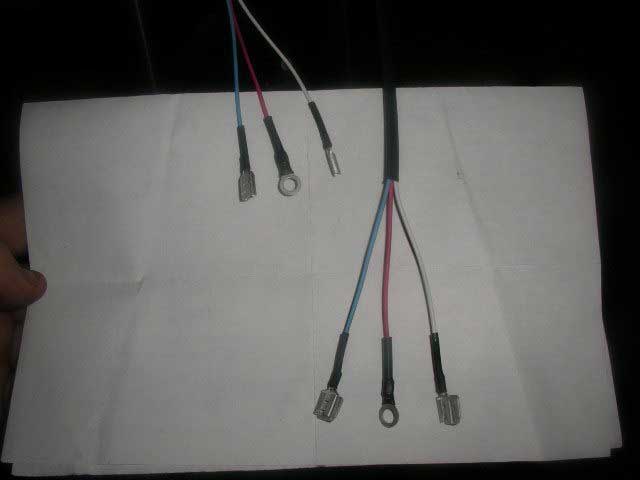
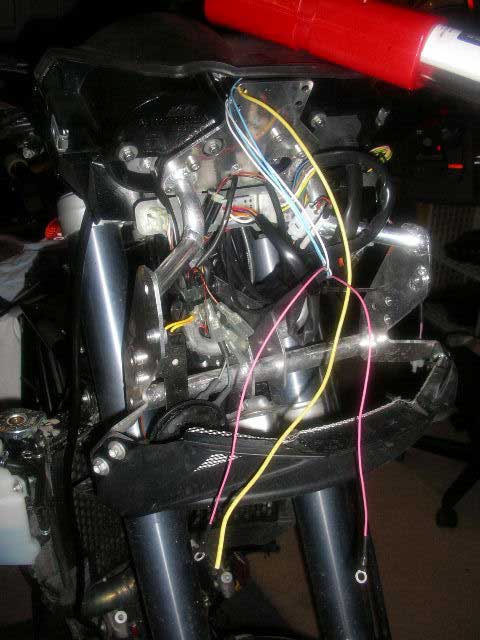
No brainer on the wires. Follow the existing bundles down to the steering head tube and out to the front where you'll connect.
I used dielectric grease and heat-shrink tubing. I'm kinda fastidious as nothing would piss me off more than losing connectivity because of corrosion or crappy connections.
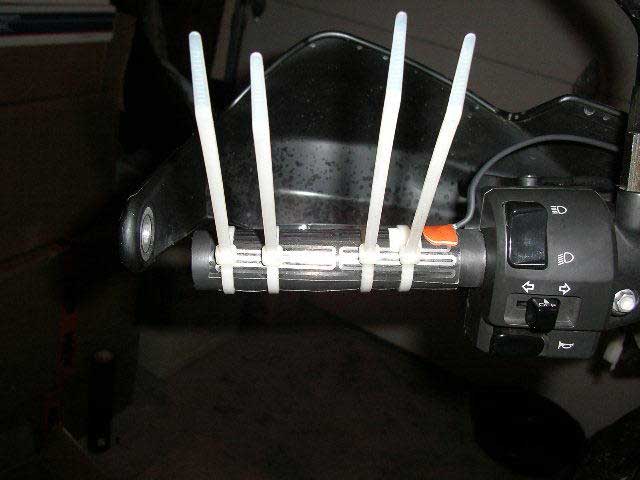

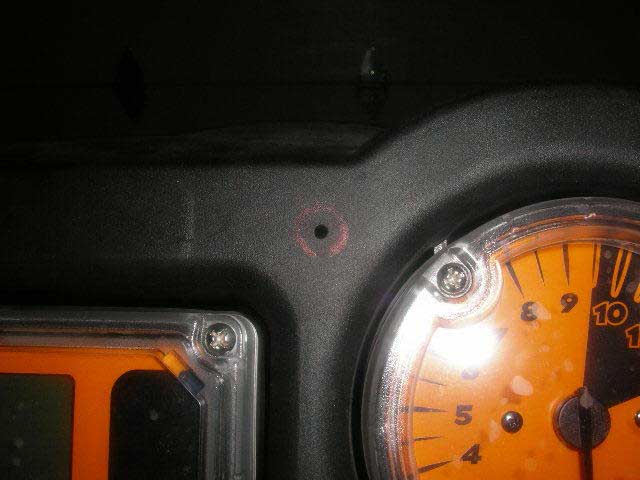
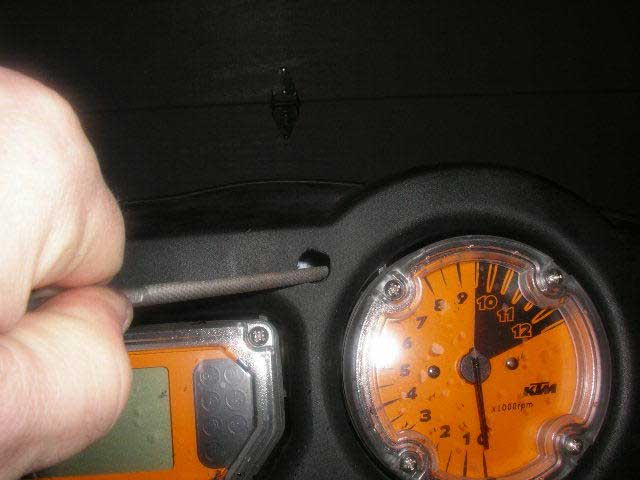
4) Drill the port for the toggle switch, install the switch and connect Hi-Low setting wires:
I used the hi-lo switch marker as a template to see where I could drill without having to take the instrument cluster apart. Down low in the little triangle like everybody else did it looked cool but it was kinda late, I was kinda lazy and so I put it up top where I could easily get to it now and later with winter gloves while riding. I know, I know - all you guys with plans of racing your 950 in the next Por Las Pampas as a warm up to your Dakar effort are going to call me a Dirt Winger. But hey, what can I say? I gotta be me, you know  ?
?
Also, start out slow. Use a center punch to mark where you're going to drill, drill a pilot hole and check your work behind the instrument shroud. Drill a little bigger, then bigger and so on until you're at the right ID.....1/2" or 13mm in this case. Smooth it out with a rat tail file if necessary.
Connect the wires to the toggle switch and then install the toggle switch. It's too tight behind the shroud to install the switch and then connect the wires so connect the wires first and then slide the toggle in from behind the shroud. You should have an arrangement that looks something like the last two photos.
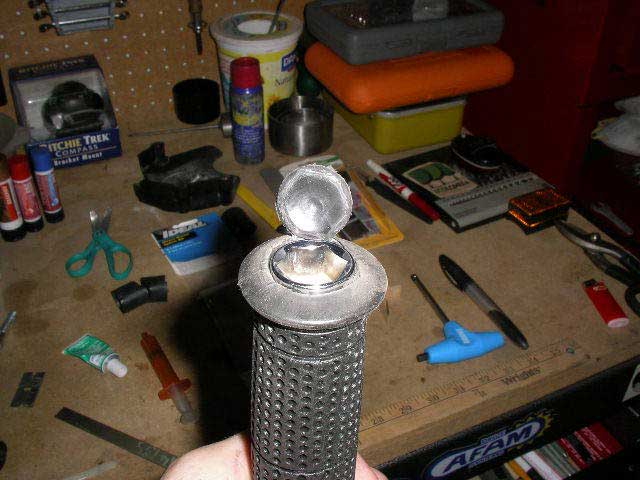
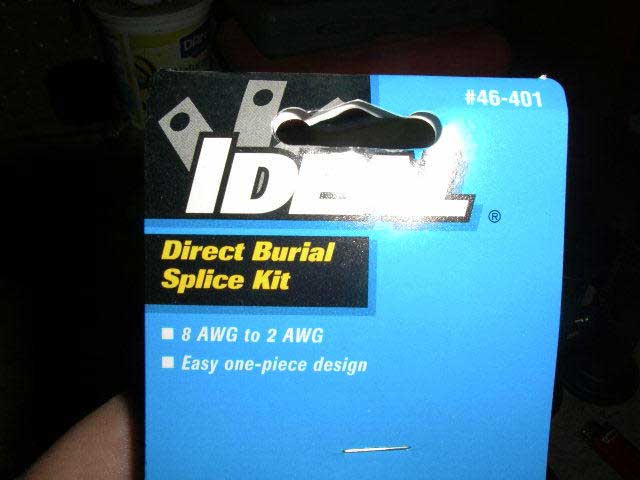
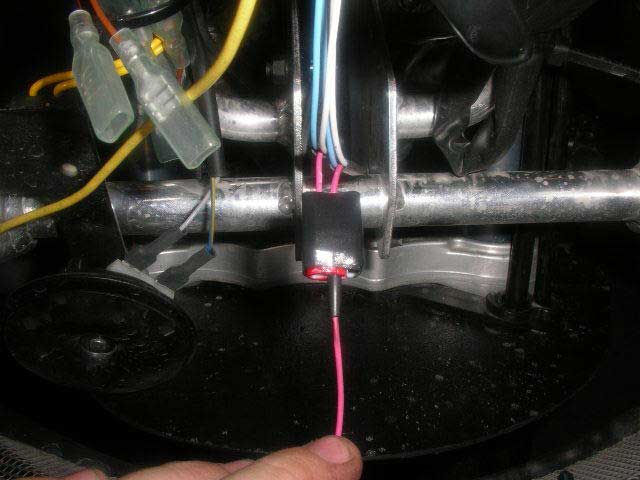
5) Combine the ground wires and hook to the ACC2 ground:
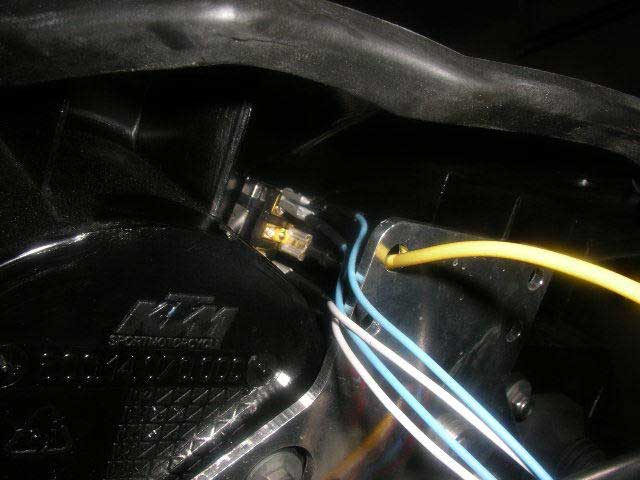
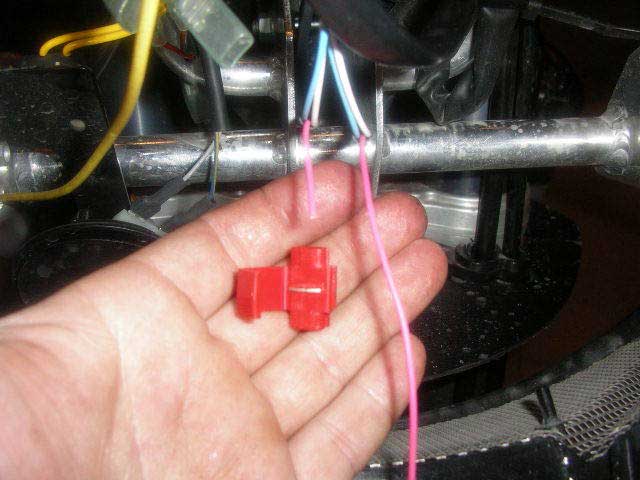
I couldn't find a suitable place to ground the two red wires (Sym-Tec's ground wires) with the supplied ring terminals. I looked around and found the ACC terminals bundled up on the right sub frame (pilot's right). I chose the ACC2 ground wire (standard brown) which was readily accessible & on a switched hot circuit....you can see it in the upper part of the two photos (before splice and after splice). I used another tap-in splice connector from 3M and wrapped it in electrical tape.


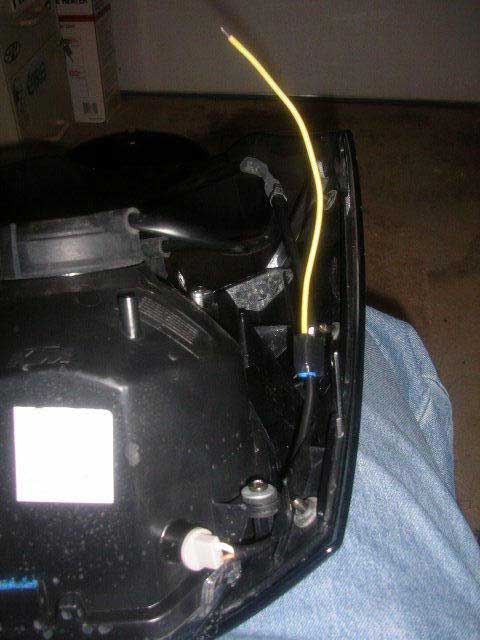
6) Install a 5-7.5 amp inline fuse into the yellow power wire & tap into the Euro headlight parking light:
Cut the yellow wire in half and install an inline fuse. I forgot to take a picture but you can see the yellow wire hanging down in one of the above photos. If you've made it this far with me, you're probably on the ball with knowing that you should put a fuse between your power and your demand. This will prevent the small parking bulb from acting as a fuse.
Next, cut a small piece of the insulation away from the white power wire. Tap in there.
The fuse also acts as a quick disconnect when you need to take the headlamp off for whatever reason.

7) Install grips, test & let glue set up:
The manufacturer recommends using a 2 part epoxy which is what I have used in the past. Hair spray and a good contact cement will also work. Whatever you use, make sure not to get any underneath your throttle tube.
Switch on the ignition, turn your parking light on, switch the grips on low and then high and check for heat.
Woo-hoooo!
Also, a technique if you use regular cement is to cycle the grips on and off periodically during the day to help the glue cure. Epoxy will set up on its own but the contact cement can take a while. Epoxy is the best but I'm lazy and I had some Thermarest glue sitting on the bench.

Disclaimer: The information contained on this page and on this site is condensed from the combined wisdom of the members and contributors of the Orange Crush Forum. The contributions are reprinted here exactly as posted by the contributors. The spelling, syntax, grammar, etc have purposely not been corrected in order to retain its original flavor. The contributors are from throughout the World, and English may very well not be their native language. Don't be an ass and complain about the lexicon. It is mostly subjective, with a little objectivity thrown in for seasoning, based on the experiences of the contributors. Use this info at your own risk. The site owner is not responsible for its accuracy or validity. None of the procedures described should be taken as recommendations by anyone. Take anything you read or hear anywhere, but especially on the World Wide Web with a very large dose of salt. The cognoscente is a skeptic.