Electronic Cruise Control for the 990
By:Smitty141
Hi guys, just thought I would share this with everyone. I have installed the Audiovox CCS-100 electronic cruise control on over 70 Yamaha FJR's in the past two years. So today I thought why not my 07 KTM 990.. The biggest problem is where to hide the servo unit.
Here we go... Please remember all disclaimers apply!! Do this at your own risk!!!
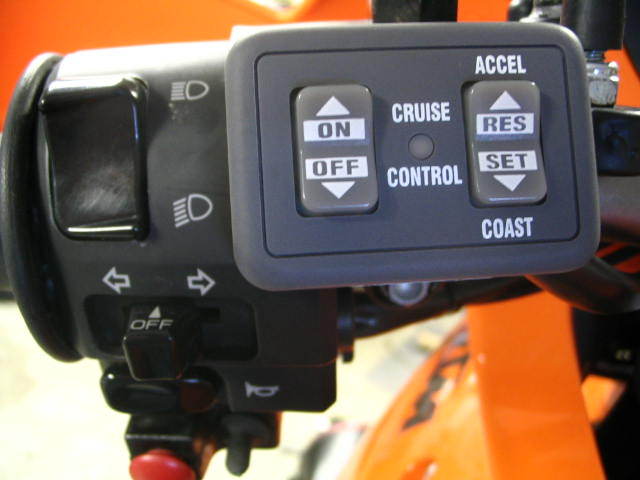
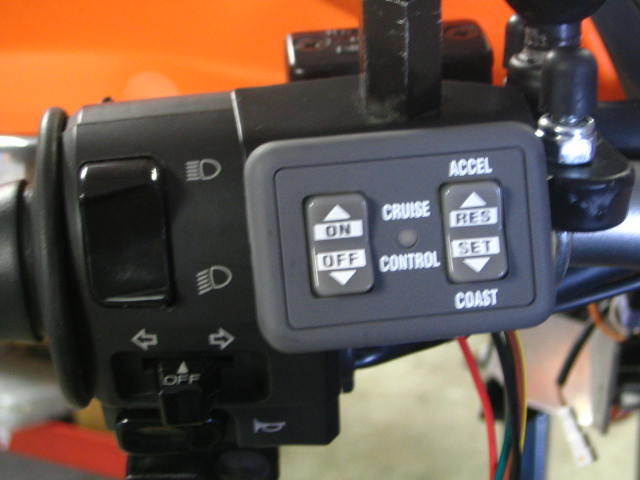
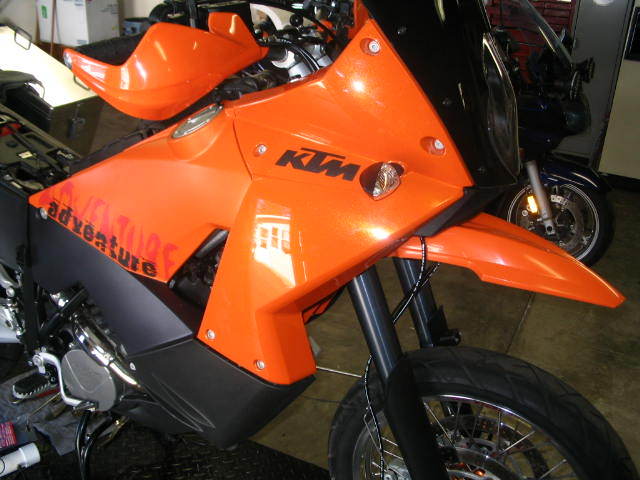
Heres the only thing that shows... The control pad.
This was not a easy job, and it took me the better part of a day. I think it is a great farkle, and will be great to have for my trip to bike week and Key West trip in March.
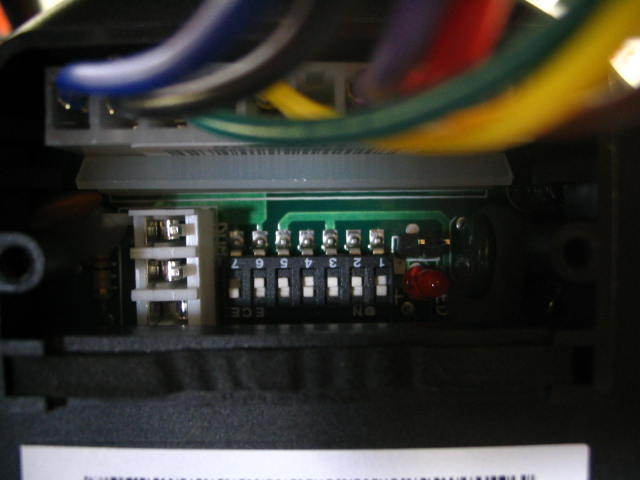
To start you will have to remove the fuel tanks and upper bodywork. You will also have to remove the airbox cover to be able to hook up the linkage. I started by setting the dip switchs in the servo. Here is the settings I used and have work great.
1- on
2-off
3-off
4-on
5-off
6-off
7-on
You also need to remove the black jumper near the dip switches.
I am hiding the servo under the right upper bodywork. There is room between the outer (orange) body and the black inner plastic. I also drilled a 2.5 inch hole in the inner body to run the wiring and servo cable out of.
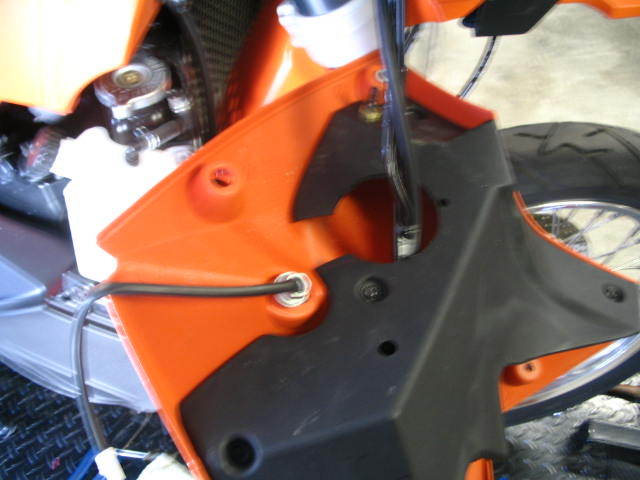
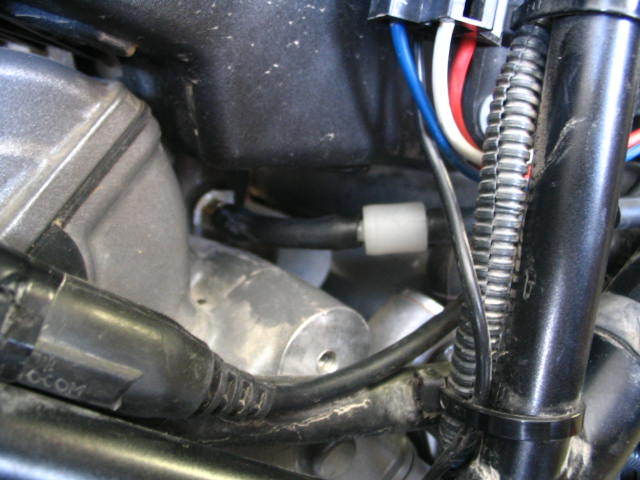
I ran the servo cable under the speedo/tach and to the left side. You want to take up as much of the cable as posible. Then you feed it next to the throttle cables. There is a rubber gasket that the throttle cables pass thru to the throttle bodys. I noticed the is a spot for one more cable..SWEET.
Trim out the hole and your set!!!
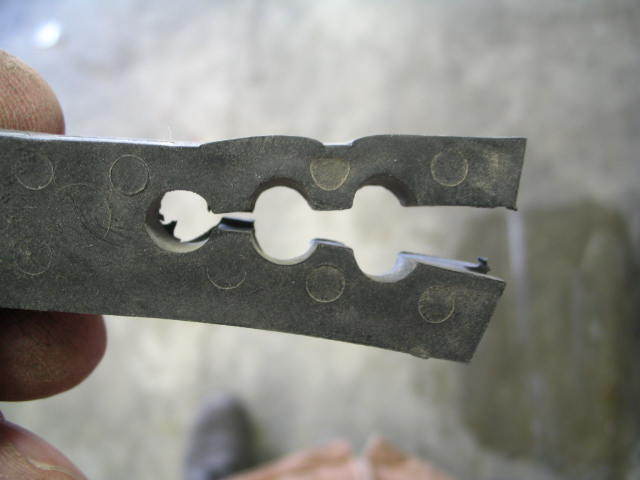
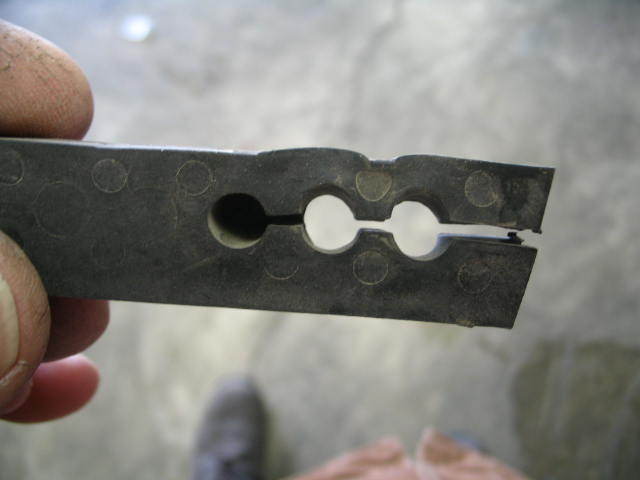
Next you will have to drill a hole in the TB linkage. I used a 5/32" drill bit and a cordless drill. Just be sure not to drill to close to the bend in the linkage bracket. If you do it will be very hard to get a bolt/nut thru it.
I used 3 balls of chain, and bolted the link to the TB linkage. This is needed so nothing will "hang-up" with the twisting of the throttle. Just remember there must be just a little slack at idle in the chain/servo cable. Also be sure to work the throttle back and forth to make sure nothing hangs up.
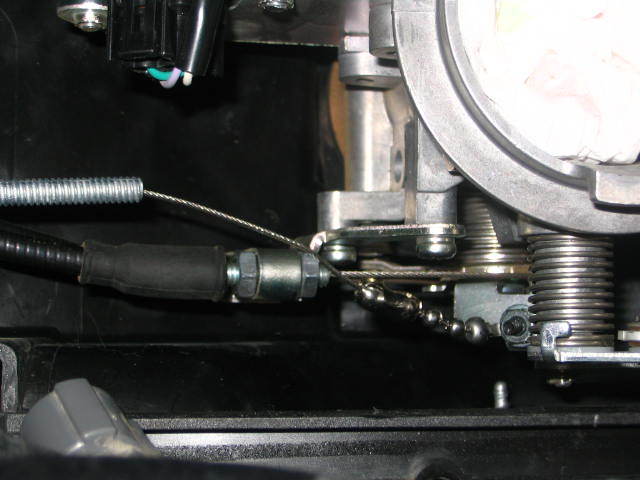
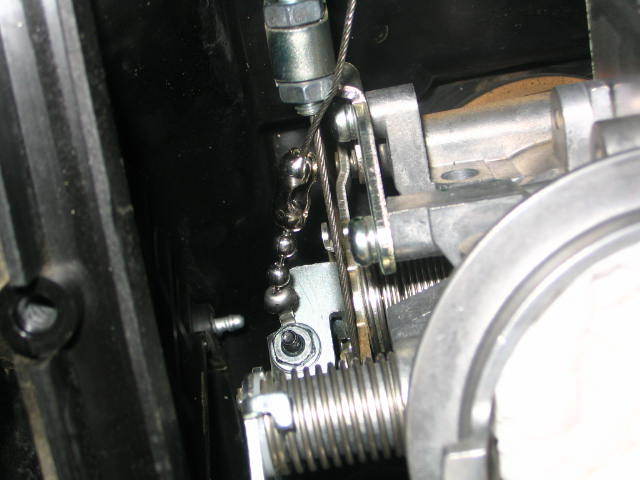
There is a clamp that comes with the kit to clamp the servo cable to the stock throttle cable. Just do not clamp it to tight and pinch the throttle cable.

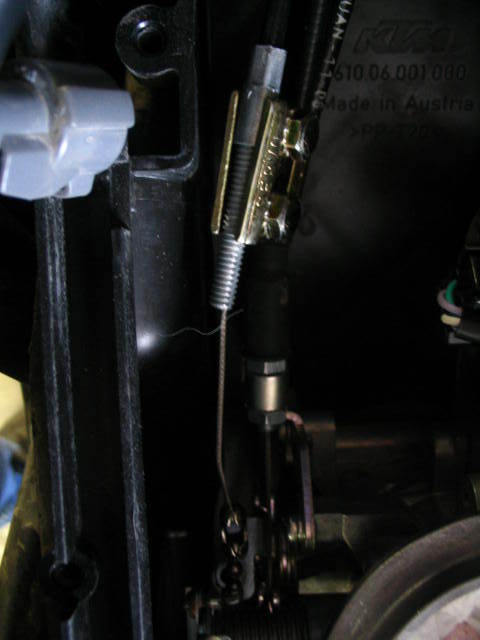
Next use the rubber gasket and put the cables in place.
Once you have this done you can replace the air filter and put the airbox back together.
Wiring comes next!!!
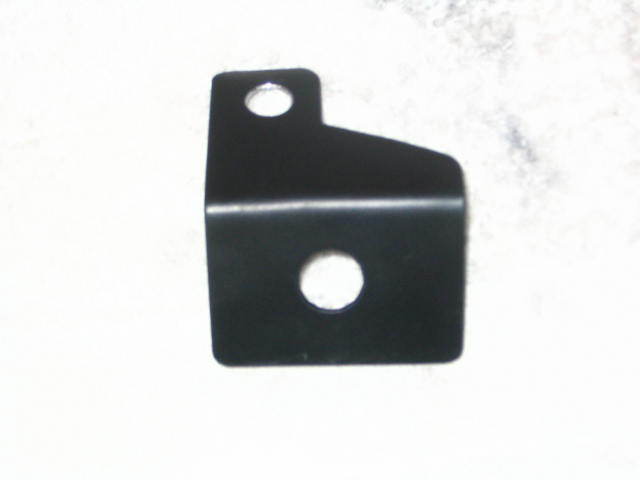
The kit comes with a control pad. I have made these brackets for the FJR's and just trimmed the tab off. Drilled a new hole and thats it. A bracket can be made from light sheet metal and bent in a vise.
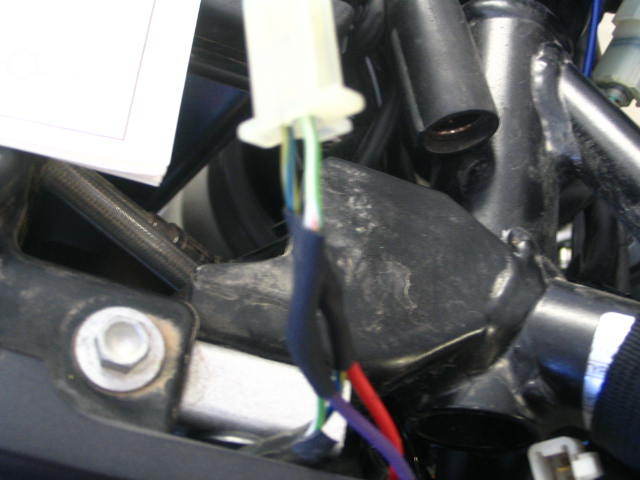
I ran the control pad wires thru some plastic tubing for the factory look. I mounted the bracket under the left mirror. Simple remove the mirror and use it to hold the bracket in place. Run the wires along the bars with the factory wiring. Then run it with the headlight bracket to the left side of the bike.
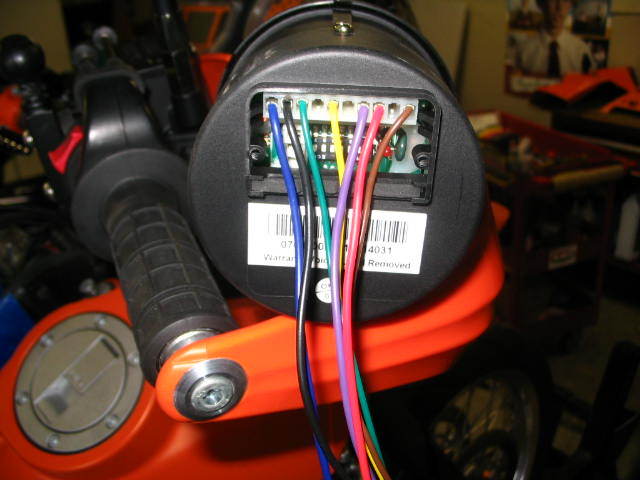
There is two ground wires and two positive that needs to be hooked up. One black (gnd) comes off the servo and will need to add a piece of wire to it. Just cut the ring terminal off it and add some wire to it. Run the wire to the left side of the headlight. I tied both the black wires together then to a GOOD ground.. There will also be a grey and a red/orange wire to hook up. The gray controls the back lighting of the control pad. It can be tied to the red/orange to pick up power. Hook up the red/orange to a keyed power supply.
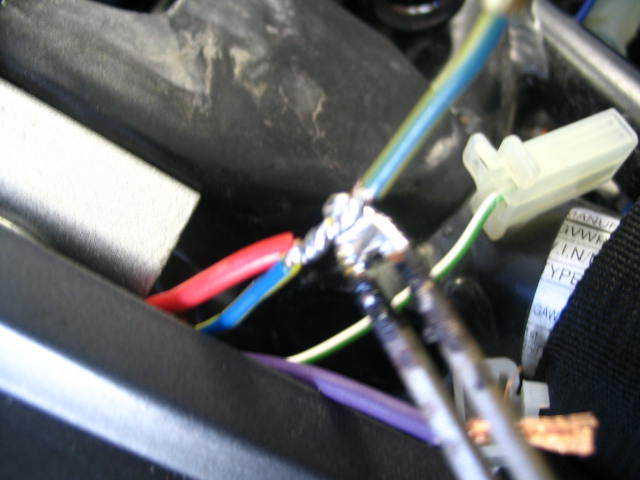
There is three wires you need to run to the rear of the bike. A red, purple, and a blue with this tag on it.

The red and purple hook to the brake lights. The is a molex connector on the right side above the rear brake light switch. The switch is on the rear master cylinder. Red ties into the blue (bike) wire... The purple hooks to the white (bike) wire. I always solder every connection..
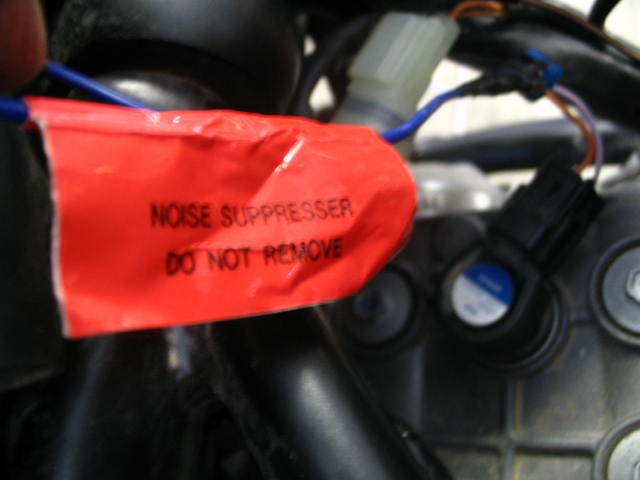
Next is the blue wire with the tag. You can shorted this wire if needed, just make sure you leave the resistor (under the tag) in place. If not, the cruise will not work!! It will solder to the coil wire on the number two cylinder. You will have to trim the plastic cover back a few inches to get to the wires. Next solder the blue wire to the blue with white stripe wire on the coil...
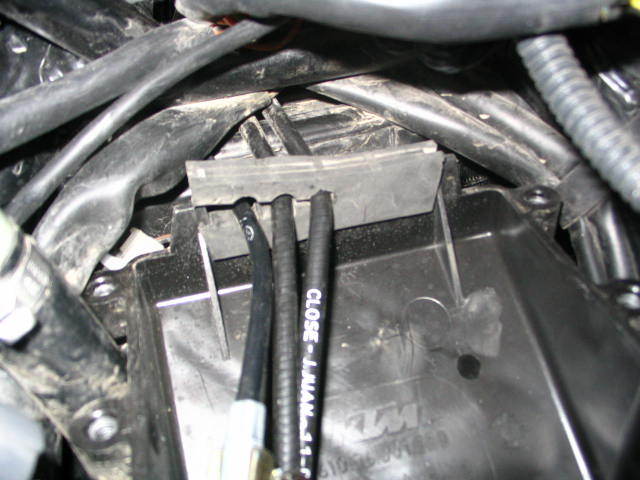
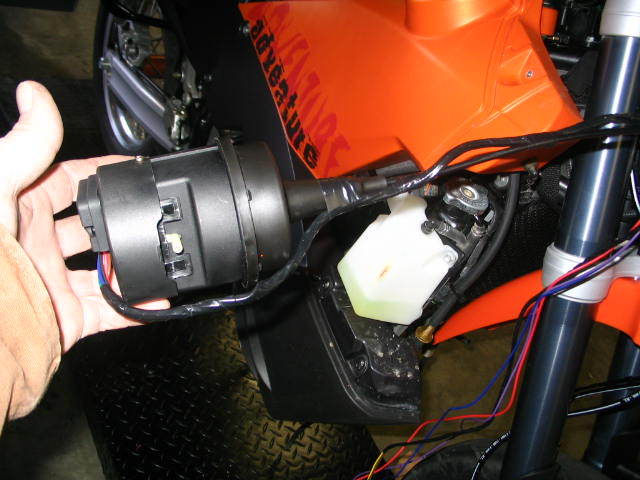
Next is the vacuum supply to the servo. I ran the hose (included in the kit) up the right side from # 2 cylinder. There is a vacuum fitting on the right side were the throttle body hooks to. Since I removed the SAS this fitting has been blocked off. If you look at it with the hose removed the opening is very small. I removed it and drilled it with a 1/8" drill bit and the reinstalled it. Slip on the hose along with a check valve. The one I used was from my FJR installs and came from US Plastics. They can be bought from local auto parts stores.
The vacuum hose runs to the servo on the right side.
Heres the servo ready to be placed under the bodywork. And your done!!!
You will have to take your time and it will work fine. Make sure you tie all wires and hoses so nothing gets pinched. Ride safe and enjoy!!! Smitty
Disclaimer: The information contained on this page and on this site is condensed from the combined wisdom of the members and contributors of the Orange Crush Forum. The contributions are reprinted here exactly as posted by the contributors. The spelling, syntax, grammar, etc have purposely not been corrected in order to retain its original flavor. The contributors are from throughout the World, and English may very well not be their native language. Don't be an ass and complain about the lexicon. It is mostly subjective, with a little objectivity thrown in for seasoning, based on the experiences of the contributors. Use this info at your own risk. The site owner is not responsible for its accuracy or validity. None of the procedures described should be taken as recommendations by anyone. Take anything you read or hear anywhere, but especially on the World Wide Web with a very large dose of salt. The cognoscente is a skeptic.